 |
| Shit just got real when you are about to deal with a beast like that. |
Well... That's really dramatic. I wasn't expecting a new Hero Dungeon to arrive this week. Let alone one that presents a fight with an awesome looking enemy. Let's first look at the given backstory -
Taken from the Official site -
"From the Magical War of Kounat to the creation of the Tower of Disappearance, Aernas was constantly at war. In the past, the Dimension’s Door connecting Aernas and Elyos caused the realms to be thrown out of balance, and thus the Gods, recognizing its risk, decided to destroy Aernas.
The three goddesses that were once in charge of Aernas —Ernasis, Lisnar, and Amenias— voiced dissent and pled for Aernas to receive a final chance to determine its own fate, putting the decision in the hands of its inhabitants. The goddess of love and spirits, Lisnar, sent Harkion to Aernas to serve as their test.
Harkion, the divine beast, appears to the people of Aernas at once."

==============================================================================================================
Conditions:
- This is a pure 1v1 fight with the divine beast. No funny summons from Harkion and you will not be able to use any *regular support items during this fight.
- Any character of any level can enter this dungeon.
- This dungeon is only open from 8:00am - 11:50pm PDT. (11:00pm - 2:50pm GMT +8)
- Yes, a very inconvenient time for the Asian continent - but this is NAGC's region, so deal with it those who can't play. (I'm affected too)
- You can enter only 3 times a day for each character. (You must also re-enter the room to play again)
*Again taken from the site, these are the listed items that are in use as support items.
 |
| Ah dang, they all cost money @_@''' |
==============================================================================================================
Rewards:
From the list stated in the website, there are a variety of 20 items that can be randomly obtained from the LoJ support chests. (They appear in your mailbox only on the next login)
 |
| In short: Every run gives you one box (failed or not) |
 |
| Nothing too fancy, but if it's free stuff for participation, why not? |
Primarily, these are the real prize attractions for running the dungeon.
 |  |
 |  |
 |
Points - How it works:
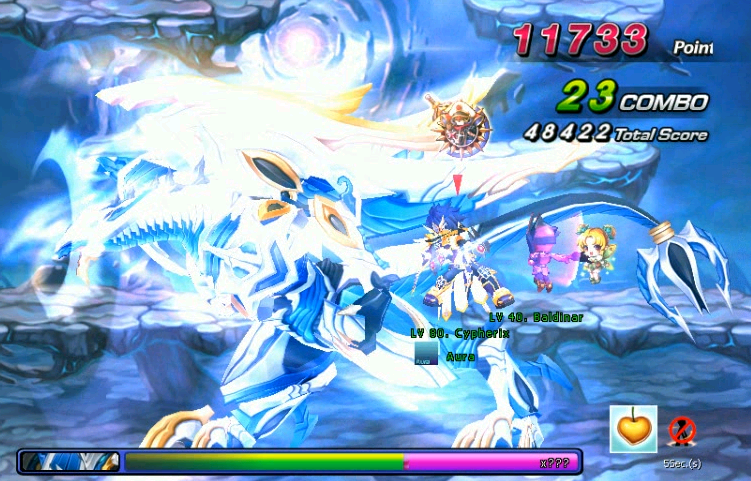
Each character is allowed 3 tries against Harkion. The points earned from each run until the 3rd is accumulated and accounted for at the end of the day, when rewards are then distributed into your mailbox on your next login.
So simply put for clarity -
1st Run - 200,000 points
2nd Run - 200,000 points (Accumulated: 400,000)
3rd Run - 200,000 points (Total: 600,000)
Result - Thus having a final total of 600,000 points, this character will be eligible for a Tier 21 chest which will be credited into the mailbox sometime between the 7 hour gap after dungeon closure.
Practically speaking, the benchmarks for certain key/important items are as follows
Minimum Point Score of -
2,800 - 1 Harkion's Ring Shard
8,200 - 1 Ring of Beefiness
16,000 - 3 Epic Chests for Lv 69 - 84 armors (Up to 90,000 points)
65,000 - 2 Hero's Bullion, 1 LoJ Card Chest
140,000 - Maximum of 5 Hero's Bullion
350,000 - 1 Harkion's Earring Shard
500,000 - 1 Land of Judgement Shard
Based on the list above, depending on what you're fighting for, you don't have to put in maximum effort - There's just too many characters to handle, too little time!
Most importantly for the highlighted Shard items, the Forge allows you create these items at the Events tab, once the necessary materials are gathered.
 |
| I don't know about you guys, but the accessories are just beautiful to look at. |
==============================================================================================================
Gameplay - The Breakdown:
I made a few runs, but only 3 were reasonably successful. Even Dragon Knight didn't make it that far compared to others
============================================================================================================== First let me point out - pun intended - something about the point system. Points are - as you may have already observed - not equal to the damage dealt. There are mainly two factors determining the amount of points earned. The amount of damage dealt and where you hit Harkion. Harkion is generally divided into two portions - his legs and the rest of his body (including his head area, which rests on the 3rd platform levels).
 |
| Your focus is on the green box |
You will earn less points attacking his legs than the rest of his body. It is probably deliberately set this way because his legs are passable which allows you to hide under him where he cannot attack physically, forcing you to come out into harm's way and attack his body instead. Because the amount of damage dealt is also a factor, whack amounts of critical damage and back attacks will increase the point rate as well. Also during phase transitions, any damage dealt also counts as points as long as it hits Harkion while he goes into scripted animation.
With points explanation out of the way, let's move on to the start, Phase 1.
============================================================================================================== Phase 1:
 |
| There's no way we're forgetting his thunderous entrance |
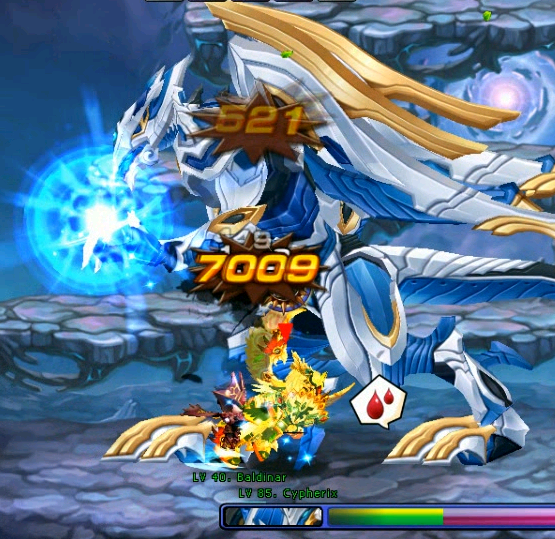
Right at the beginning Harkion and yourself stand end to end so make a dash for him - carefully. But of course his starting attack strength is really weak so who cares right? (Yes, really).
 |
| A mysterious HP limit can only be a sign of bad things to come. |
Right from the get go, Harkion is able to use all of his attacks - 6 out of 7 - save for one only available from Phase 2 onwards. (More on those later)
Phase 1 is simply to ease the player into the combat scheme against Harkion. There are no background gimmicks (traps rather) and hopefully you get to experience all 6 attacks when they are at their weakest, before you enter Phase 2 where they will increasingly hurt more and more.
============================================================================================================== Phase 2:
 |
| Reminding you that play time is over |
Around the 1:50 mark, Harkion lets out a roar and this cutscene ensues. Some modules on him seem to be powering up and his wings expand to take flight. Soaring into the skies, Harkion flies into the picture on the right at high speeds and blitzes off the screen.
 |
| The reason why right was highlighted. And he will fire his lazor! |
Harkion makes a sudden blitz from the right 3 seconds in after the game screen reverts and players will have to dodge his spiraling body to avoid damage; It isn't over yet! Very quickly on the return flight he will fire an energy blast that rushes across the screen, this time coming from the left. Dodge this again.
While the dive in does quite a bit of damage, the beam is almost lethal if you let it rip through you. It won't kill however, but a weak stat character will be easily reduced to fatal immediately.

Once the beam passes, energy geysers will erupt in a line from left to right in a chain until it reaches where Harkion lands. Avoid getting hit by these as they hurt quite a bit. Also, this chain of geysers only occur once like this during the Phase 2 transition.
In Phase 2, Harkion's attack power is raised quite substantially, especially for some of his energy-based attacks. He also uses his last attack here which is reserved only from this phase onwards. (Again more on that later) This is the phase where players can really die if they don't bring their skills to the table after 1:50 minutes of messing with him.
 |
| GOD. DAMN. EXPLOSIONS |
After checking out GCForums, it is confirmed that these explosions can be determined from the last position Harkion uses Attack 1 (see below). After 10 seconds or so, a second explosion will take place at the same spot he fired at. So keep clear of it, or observe that spot from a space distance to know you can return there!
============================================================================================================== Phase 3:
 |
| Reminding you that shit just got real, time to up the ante! |
Now around the 3:20 mark, Harkion decides it's time to up the ante and conjures two spheres of seemingly light and dark divine energy, which immediately coalesces into one torrent of mixed energy and sends it into the air, where Harkion directs his beam attack into the sphere and detonates it into a cluster bomb of energy bolts.
 |
| This is one falling star shower you wish you don't get hit by. |
The resulting cluster of energy bolts will rain onto the battlefield for a good 3 seconds once the screen lights up blue. Be very sure to have an evasion plan here, as there are no projections of their trajectories and each bolt deals a severe amount of damage which can quickly accumulate into fatality, due to how fast they fall combined with their stun per hit. Just another note: They cannot kill, but a few shots will quickly put you into Fatal.
Now, remember the geyser chain that occurred at the start of Phase 2? They're back as active traps, and this time will appear at random, but projected positions indicated on the ground. The frequency trigger is one geyser every 2-3 seconds.
|
| These will now become your pain and bane. |
The issue with these geysers is their frequency. Fortunately, they can be completely avoided if you stand on the top most platform, as their sprouts only reach 3 platforms high - up to Harkion's head level. So the problem is because of their frequency, the player has to keep an eye out on their projection points and evade a lot more than previously performed. This makes attacking Harkion a lot more problematic as long as they sprout too near or under you.
Note: Geysers are non-lethal damage.
In Phase 3, Harkion's attack power yet again increases to dangerous levels, and each hit taken from here on has severe consequences for the player, especially for the ones with no healing abilities. As mentioned during Phase 2, Harkion has used all his techniques and will bring no more surprises to the table, as least from himself.
============================================================================================================== Phase 4:
 |
| In most games, Wind & Lightning are a matching pair. Harkion decides to make it happen. |
And finally around the 5:00 mark, Harkion goes all out and brings out his last technique (trap rather), a dual cyclone of death.
|
| Now remember these? They've come to bother you this time! |
 |
| Everything all at once... Good heavens. |
The cyclones come as a pair, one traveling much faster/slower than the other. The energy bolts on the other hand fall around every 2 seconds at random locations, sometimes accurately aiming for you. Because of that, MP charging is ill-advised as a sudden bolt can just snag you from the air.
At this point of the battle, the last 40 seconds is a survival game. It becomes very difficult to land hits on Harkion without being distracted by the constant threat of the traps.
And just as troublesome, is Harkion's yet again boosted attack power. Every hit has fatal consequences.

Once near the 5:40 mark, the battle will abruptly end with Harkion seemingly lamenting at himself in failure to defeat you, or being "defeated" by his opponents. The dungeon will then end immediately in "Failure", although it is actually a victory sequence nonetheless.
============================================================================================================== Attacks:
In total, Harkion has 7 types of attacks he can utilize and each of them poses a threat of their own. Knowledge of their workings are crucial to lasting the fight against him.
Attack 1:
 |
| Run fast, or just dodge-move away. |
A flare of energy with Lock-On properties against you. When Harkion does this, there is an audio cue that is the same as machine gun fire from the Spiderbot (Hammer's Reach). Upon hearing this, take quick evasive action within a second to avoid it. The flare has a fairly small blast radius so a dodge-move is enough to escape it.
Attack 2:
 |
| All you need is dodge. |
This one can be pretty sudden as Harkion simply turns to his side while a dark energy flare appears behind him. Because of its extremely large burst, it is easy to get hit by it if you weren't expecting. It also causes 4 seconds of Confusion as a result, and you'll need to quickly regain composure and evade the next attack, a wormhole which brings down a crushing claw from Harkion above your last position. Both attacks can be damaging with the second one doing more than the first.
Attack 3:
 |
| Harkion's large rending claw swipes. |
For the most part, this is what you'll be avoiding the most, and happens to be the easiest one as well - At least during Phase 1 & 2. The first and second swipes aim towards the middle while the last one has a very large arc and even hits the bottom where his legs are. This attack chain isn't lethal in itself but getting hit by the third swing can potentially kill when you're in fatal status (sometimes it doesn't, which is odd).
By the time Phase 3 arrives, you WILL be concerned over this attack. (See Attack 7)
Attack 4:

This claw attack is a little trickier than the last, due to its deceptive strike zone. Its actual range is depicted by the red boxes, where it doesn't actually touch the bottom and top platforms completely.
The claw traces will hit at regular intervals at first, 2 hits at a time. But during Phase 3 & 4, the damage is very much higher and hits rapidly, giving any unfortunate player only 1-3 seconds to perform an MP-break or risk death - The damage is instantly lethal.
The only problem lies with anticipating this attack, as there is no telegraphed cue to indicate he is going to use this. An overly offensive and severely injured player will easily fall prey to this attack and die.
There is however a way to mitigate this attack. The traces are independent of one another and skill delays can actually outlast them. In the worse case scenario, the player may end up taking less damage (one instance than two) or be quick enough after a skill delay and dodge the next claw trace.
Attack 5:
 |
| "This hand of mine is BURNING BLUE! Its bright glow tells me to KILL YOU!" |
This next attack is a tricky one to deal with so pay attention. After Harkion gathers a sphere of energy in his hand, he will then crush it, which quickly disperses an array of initially harmless spheres on the ground both in front and behind him.

Depending on the position where Harkion is at when he used this attack, it is possible to completely and safety avoid these impending spheres of doom. Harkion will always disperse 4 spheres in front and 2 behind him; which are well spaced but not far enough to cover the entire field at once. Which means if he is at one edge of the battlefield, the other edge will (should) be completely safe as the spheres won't reach that far.
In the above example, he used it in the middle, leaving my Lire nowhere to run except to evade the bombardment.
 |
| WWE: Here comes the pain! |
One of Harkion's coolest poses in my opinion, this is where the tricky part comes in. At this point there are two ways to evade the array, either Dodging or skill delay. Both methods carry their own risks and it is up to the player to decide which method is currently reliable. I'll explain-

This attack is deadly for its ability to launch you into the air, leaving you helpless while you take a lot of damage from the spheres and their explosions - worse if you're sandwiched by two explosions. It is highly critical of a player to focus well when evading this attack.
Skill Delay
If timed too early, this will actually freeze Harkion in his place and delay the bombardment. There is a small window just as Harkion's claws nearly smash into the ground, bouncing the spheres to their destruction. This is the only window where Harkion will not be affected by your skill delay and a timely casting will render your evasion method successful.
If you fall just short of the opportune window, you have a chance to prime another delay attempt if you have remaining MP and Harkion's attack should follow through instead of being frozen this time.
Dodging
This method of course will not affect Harkion, but carries a risk that is dependent on the Dodge type the character has. This method has 2 ways to go about it.
- Dodge-moving forces the player to outlast the explosions while being in the thick of it, by making use of its extra frames.
- Stationary dodging requires the player to stand in the safe zone between both arrays (where Harkion stands) and use Dodge to simply evade the initial shockwave from Harkion's initial ground slam.
- Remember, the bounce height of each sphere is variable. If a blast threat still exists because of a low-bounce sphere next to you, the player must then take Dodge-move action to further escape any possible damage.
Attack 6:
This attack is highly dangerous and its first indicator will be Harkion taking off into the sky, only to reappear quickly on the right edge of the stage with a deafening roar which repulses the player greatly. Once the player sees Harkion rising, they should make haste towards the right side or the 4th platform which provides you safety from the repulsion effects of his roar.
 |
| Mega-Particle Cannon. Fire! |
Very shortly after the roar, Harkion fires a very wide beam ahead, hitting up to 3 platforms but safely omitting the 4th. Due to its very long blast time, it takes 2 MP breaks to outlast the beam, or else you will be taking a lot of damage in the meantime.
If you somehow manage to climb to the top platform, you can safely traverse across the top towards his back where you can freely, but carefully, attack him.
 |
| This isn't even my final form! Scattering Mega-Particle Cannon! |
Contrary to belief, it's ok to take this attack head on - If you don't move a muscle. This beam attack simply knocks you down for one hit if you are standing on the ground. But if you jump even once, it'll continuously blast you into the air and take more damage instead. Know the differences!

After the two-stage beam attack, Harkion will be momentarily drained and recuperates idly for 2-3 seconds. During the entire attack, Harkion's back is completely unguarded and players are free to unload all forms of attacks against him - but with due care.
Because Harkion's body lurches forward half of the time, forward-lunging techniques and skills can accidentally bring the player off the platform and right into the beam attacks. Players should take careful consideration of the skills utilized or exercise good control to prevent mishaps during this opportune moment of vulnerability.
Attack 7:
 |
| Harkion's most dangerous attack |
Quick and sharp hand-eye reflexes are required against this attack, to observe and react against the arm that moves.
Without a doubt, this is Harkion's trickiest and most dangerous attack to avoid and counter. Only available from Phase 2 onwards, this attack deals the most intense damage in one single hit, and has an absurdly large hit zone. The only indicator of this attack is a short roar and sonic lines emanating from Harkion followed by a quick swipe from either his left or right hand, generating the large energy wave you see in the image above. After this move itself, he will leap towards the left or right, making the dodge maneuver more complex should his body push you further into range of the wave.
In addition to the leap, it creates a harmless tremor that launches the player into the air for just 1 damage. If you're in Fatal condition however-
 |
| Kenshiro said it. |
Lastly, when I said absurdly large hit zone. I meant absurdly LARGE hit zone. Not only is it too high to scale over, just observe in the picture how far I am from the main body of the energy wave. I died from being hit by the trail instead. It's no joke that the sheer power of this attack can easily end your run during the 3rd and 4th phases.
Additional: Harkion likes to combine this attack with Attack 3 (Slash Combo). Although not always, he will quite often do both of these attacks together. Always be prepared to anticipate. Because if you're out of MP or SA gauge.
|
| He's just reminding you. |
 |
| Harkion's answer to anything that hits him too many times. |
Harkion's dodging maneuver is infamously cheap to some degree. But because of that, is what makes planning the fight against him fun.
Harkion is impervious to all attacks while dodging, and he can dodge any time he likes while idling and taking damage. Fortunately for one special case, he can only use it to break off from (Attack 4). Every other time he attacks, he is otherwise unable to just dodge away as he likes. To this effect, Multi-type attacks are ok if you plan them out well, while Burst damage is best most of the time to prevent him from dodging randomly.
============================================================================================================== Conclusion:
There's actually a sort-of bottom line to this fight. It's not to survive till the end but instead, do as much as you can against Harkion till the end.
Unless I'm missing some kind of link, there are no additional bonuses for surviving this duel except seeing him take off and watch yourself "Fail".
I hope everyone reaps some great benefits and treasures from this Dungeon. Best of luck and have fun :D
==============================================================================================================
No comments:
Post a Comment