
==============================================================================================================
Foreword: This article features Altar of Judgement, Temple of Destruction, Forest of Life & Fortress of Ascension.
I'm no official guide so, no obligation to start from scratch at Trial Forest. But really, who wants to know about the absurdly easy stuff?
So anyway, what I'm going to talk about here are the observed changes to enemy behaviour in general, most of you probably noticed enemies and even bosses have their attacks taken away. So we'll go into those -with detail if necessary- and highlight any important things for players to be aware of. Because let's all be lenient and fair- not all players started out like us, not everything is EASY, and the current season isn't that forgiving with gross mistakes either.
Links:
Once a new revamp article is published, the links to similar articles will be featured here.
Xenia 1 (Xenia Border - Wyrm's Maw)
Alcubra 1 (Goblin Work Site - Sands of Illusion)
Alcubra 2 (Deserted Town - Seth's Pyramid)
Archimedia 1 (Hammer's Reach - Relics of Kounat)
Archimedia 2 (Zeruel Border - Kounat's Collapse)
==============================================================================================================
 Altar of Judgement


(Threat Level: ↓↓) (Offensive Power: ↓)
The Nunklemon is an idle chap for the most part unless you draw height or distance away from it, in which it will attempt to leap at you, or shoot its spikes into the air.
Tactical Solutions:
Killing the Storm sisters is not so difficult now with their lowered HP cap and is easier to do by whittling their HP down together. The only issue is killing them both or within an approximate 10-15 second buffer, should they be defeated separately (Usually not a problem for a smart player or coordinated team). Having them both in your sights is actually better so you can see what they are doing next.
Boss:
(Threat Level: ↓) (Offensive Power: ↑↑↑)
Tactical Solutions:
You can go straight for all 4 heads without trouble now, since the acid rain threat is no longer existent. Care should be taken to avoid his clearly telegraphed attacks as they are very heavy on the player.
 Fortress of Ascension
(Threat Level: ↓) (Offensive Power: ↑)
(Threat Level: ↓↓) (Offensive Power: ↓)
The Gargoyle is less of a surprise threat with its swift attack thanks to longer telegraphy. It's general offensive strength has dropped as well, making them left out as an annoyance to be chased down instead.
(Threat Level: ↓) (Offensive Power: ↓↓)
The Hierophant is less dangerous now that its damage and side effects have been reduced a lot. They still remain as an annoying enemy to hunt, and no longer teleport rampantly like they used to.
(Threat Level: ↓) (Offensive Power: ↓↓)
Heras have been much reduced to weakness. Their previously lethal magic-based attacks don't do as much now but is still dangerous when the damage accumulates. Avoid their screams and you will be fine.
Mini-Boss:
(Threat Level: •) (Offensive Power: ↑↑)
Iblis remains as deadly as before but without that defense glitch occurring as often (Yes she still uses it to some tolerable degree)
Tactical Solutions:
With the Dodge ability it should be easier to take Iblis head on. Her Guardian remains a viable threat and due care should be taken to also not prematurely exhaust your Dodge meter, as you will need to use it quite a bit. If you need MP, attacking the Guardian will also provide you with some, though no damage is dealt to Iblis.
Boss:
1st Form: (Threat Level: ↓) (Offensive Power: ↑↑)
He doesn't move physically so he's just a sitting target for you. He doesn't play around with surprise attacks anymore since they are now well telegraphed if he tries to do anything.
2nd Form: (Threat Level: •) (Offensive Power: ↑)
Previously the bane of fighting him, he doesn't ridiculously disappear into the sky now but will occasionally and will deliberately stay on higher ground than you. He also stops more often thus making it easier to attack him.
3rd Form: (Threat Level: ↑) (Offensive Power: ↑↑)
Although he's no longer as deadly as before, he still makes a threatening force to reckon with if you play carelessly with him. Some attacks are slower, some attacks are faster but all should be handled with great caution.
Tactical Solutions:
Thanatos in all 3 forms is no longer that difficult to kill because of his heavily reduced HP cap. Whatever you do, try to avoid luring him to the left where the Hellfire (Starkiln's) rune is, as it is detrimental to you more than it is to Thanatos and his lackeys; it also makes attacking him a tedious chore if he goes to the sides anyway.
| Monsters | Intel | ||
|---|---|---|---|
| Aggression: ↑↑ Offense: ↑↑ HP: ↑ | ||
| Ice Wyrm Spawns, like their counterparts from Wyrm's Maw, share exactly similar traits. The only negligible difference is that they launch you into the air instead of ricocheting you back when you get struck. | |||
| Aggression: ↑↑ Offense: ↑↑ HP: ↑ | ||
| IceFang are now less aggressive than their previous iteration, and far less treacherous. Their lack of aggression leaves them as sitting targets. Their low-bodied sprite makes it slightly difficult to hit them with wide splash attacks. | |||
| Aggression: ↑↑ Offense: ↑↑ HP: ↑ | ||
| Possibly the most useless monster around, the Endymion is severely underwhelming for her size. Her attacks are extremely weak and one of them barely even grazes the player at all. Her large size also makes her an easy target. | |||
| Aggression: ↑↑↑ Offense: ↑↑↑ HP: ↑↑↑ | ||
| Aron used to be very reactive to attacks and "cheated" his way with his "Jump" attack whenever he received any heavy attacks. While not so powerful now, Aron still boasts decent attack range with his spear. Tactics: For best results, clear the 3 IceFangs in the area before dropping one of your strongest skills on Aron, from the back. He doesn't move until you strike him once, so use it to your full advantage. Like Starkiln, Aron's spear is a full contact weapon and it will be able to snag you from anywhere near him since he swings it all the way around. Also, his sprite is rather glitchy and tends to displace players whenever he turns around or simply pushes you about with the giant boar. This can also mess up well-positioned skills, to the chagrin of many. | |||
| Aggression: ↑↑ Offense: ↑↑↑ HP: ↑↑↑ | ||
| Yamini is a hovering boss that has a knack for counteracting. Strangely enough, she is susceptible to flinching (though not to the point of disrupting her attacks) and becomes reactive against attacks as a result. Her most dangerous attack, close and/or short of being lethal is her burst of frost projectiles reminiscent of Ronan's Lunatic Force, and in greater numbers. Players must always be alert of the attacks she is about to use, for they will have different audio cues to listen to. Tactics: The only thing to really worry about is her ultimatum skill - the Death Sentence. There are many ways to bypass the assault, from skill delays to dodge moves, but the player should be alert of Yamini's scales which signal the direction of attack. Now that her crystal beams no longer cause her to move, skills have greater efficiency than before and are able to land completely without her moving away. Although, she can still become impervious suddenly by activating her own skills with Cursed Fate and Death Sentence. |


===================================================================================
Temple of Destruction
| Monsters | Intel | ||
|---|---|---|---|
| Aggression: ↑↑ Offense: ↑↑ HP: ↑↑ | ||
| The Mistone is a strange attacker which usually takes a few hits before it reacts with either attacking or buffing itself with Super Armor, making itself immune to knockdown. If you strike fast and hard enough, it usually is defeated before it can throw a single punch | |||
| Aggression: ↑ Offense: ↑ HP: ↑ | ||
| One annoying trait about the Borer is its high impact attack, which ricochets the player across the entire screen. Not only that, their hitboxes are still glitchy and can displace players when it switches directions in front of them. Besides the default Borers, they can also be summoned once by each DK Mark-I, although they are not necessary to defeat for the stage to proceed | |||
| Aggression: ↑↑↑ Offense: ↑↑↑ HP: ↑↑ | ||
| These construct droids are highly aggressive and pack quite a punch once they start attacking. Besides the annoying electric which they can generate on your mark, their projectile weapons are as deadly. They no longer shoot as much, but are just that stronger in power. | |||
| Aggression: ↑↑↑ Offense: ↑↑↑ HP: ↑↑↑ | ||
| Yamini is a hovering boss that has a knack for counteracting.
Strangely enough, she is susceptible to flinching (though not to the
point of disrupting her attacks) and becomes reactive against attacks as
a result. Her most dangerous attack, close and/or short of being lethal is her burst of frost projectiles reminiscent of Ronan's Lunatic Force, and in greater numbers. Players must always be alert of the attacks she is about to use, for they will have different audio cues to listen to. Tactics: The only thing to really worry about is her ultimatum skill - the Death Sentence. There are many ways to bypass the assault, from skill delays to dodge moves, but the player should be alert of Yamini's scales which signal the direction of attack. Now that her crystal beams no longer cause her to move, skills have greater efficiency than before and are able to land completely without her moving away. Although, she can still become impervious suddenly by activating her own skills with Cursed Fate and Death Sentence. | |||
| Aggression: ↑ Offense: ↑↑ HP: ↑↑↑ | ||
| Perseo's aggression has been so severely dulled that his attacks are limited to the occasional melee and frequent use of his healing rune attack. Without his trademark projectile attack, he deals very much less damage and loses a powerful homing attack. Tactics: His attack pattern is also dependent on distance put between you and him, so stay close and hack away while preparing to counter his runic magic. To prevent dragging the battle caused by his healing runes, be aware of what moves can easily eliminate the runes to reduce the chances of them striking you. |


==============================================================================================================
Forest of Life
| Monsters | Intel | ||
|---|---|---|---|
| Aggression: ↑↑↑ Offense: ↑↑ HP: ↑ | ||
| Decoys are extremely annoying with their high impact strikes, although they don't do very high damage at all. However, they are easy to destroy and players should be very aware of their damaging and explosive deaths. | |||
| Aggression: ↑↑ Offense: ↑ HP: ↑ | ||
| Ranged versions of the Gashimon, they don't do a lot of damage but their elevating arc of fire can be quickly climbed over by agile players. Their one other annoyance is causing mana-breaks from trying to overcome their arc of fire. | |||
| Aggression: ↑↑ Offense: ↑↑↑ HP: ↑↑ | ||
| Another version of the DK droids. They no longer have their healing ability but are granted stronger burst and projectile attacks compared to the Mark-I. They are also able to perform high-speed dashes to close their distances to you. | |||
| Aggression: ↑↑ Offense: ↑↑ HP: ↑↑↑ | ||
| The Wooden are towering, gigantic tree-bound warriors with a large attack range in both melee and range. Despite their look, they are only slow moving and large targets, allowing most skills to strike them with ease Wooden, upon death, will also spawn a Decoy in its place. Decoys spawned this way can be ignored and are not part of the stage-clearing quota. | |||
| Aggression: ↑↑↑ Offense: ↑↑↑ HP: ↑↑ | ||
| Dark Storm attacks with surgical strikes by teleporting right behind her target and Both Storm sisters have heavily reduced HP, and are much easier to defeat as a pair. | |||
| Aggression: ↑↑↑ Offense: ↑↑↑ HP: ↑↑ | ||
| 1 | |||
| Aggression: ↑↑↑ Offense: ↑↑↑ HP: ↑↑↑ | ||
| 1 |


 | |
| Decoy |
(Threat Level: ↓) (Offensive Power: ↓)
The Decoys are less vicious than before, and much easier to deal with now. Their delayed reactions make them sitting du- frogs.
- The pouncing has a longer delay so you can see it coming, it now launches you into the air instead of hard knockback.
 | |
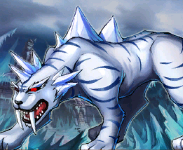
| Poison Thorn Nunklemon |
The Nunklemon is an idle chap for the most part unless you draw height or distance away from it, in which it will attempt to leap at you, or shoot its spikes into the air.
- They no longer use the roll attack, and their poison gas dissipates after a few seconds.
 | |
| DK Mark-II |
(Threat Level: ↑) (Offensive Power: ↑↑)
The Mark-II uses two main attacks, which is it's energy shot and the shockwave which is newly telegraphed. It no longer heals itself and is much easier to destroy now. Like the Mk-I, it'll deal damage upon death with self-destruction so make sure to also avoid it.
(Threat Level: ↑) (Offensive Power: ↑)
The Wooden has slight damage increase than before but is still pretty slow to attack you. It's earth spike is also telegraphed and delayed, making it easy to avoid that coming from off-screen.
Mini-Boss:
The Mark-II uses two main attacks, which is it's energy shot and the shockwave which is newly telegraphed. It no longer heals itself and is much easier to destroy now. Like the Mk-I, it'll deal damage upon death with self-destruction so make sure to also avoid it.
- If you are within sight at a distance, it'll likely fire it's energy shot at you. If you go out of visual range, it'll use its boosters to chase you down, much like the Mark-I's behaviour.
 | |
| Wooden |
The Wooden has slight damage increase than before but is still pretty slow to attack you. It's earth spike is also telegraphed and delayed, making it easy to avoid that coming from off-screen.
- Wooden heals itself if you stray away from it too long. But it isn't a substantial amount to worry about.
- A dead Wooden will always spawn a Decoy in it's place.
Mini-Boss:
 |
| Dark Storm |
(Threat Level: ↑↑↑) (Offensive Power: ↑↑↑)
Dark Storm specializes in sudden assaults, which she executes by instantaneous appearing behind you and striking with her scythe. She also uses an explosive totem that deals heavy damage if you run into it.
Dark Storm specializes in sudden assaults, which she executes by instantaneous appearing behind you and striking with her scythe. She also uses an explosive totem that deals heavy damage if you run into it.
- She is swifter than Furious Storm due to her ability to just appear behind you, she is thus more agile in her attacks and will require you to keep an eye especially on her.
 | |
| Furious Storm |
(Threat Level: ↑↑↑) (Offensive Power: ↑↑↑)
Furious Storm specializes in full-range linear attacks, which she executes via a skill-flash to let you know it's coming. She also uses a healing totem that can recover their HP rather slowly.
Furious Storm specializes in full-range linear attacks, which she executes via a skill-flash to let you know it's coming. She also uses a healing totem that can recover their HP rather slowly.
- She hits harder in general and similarly has a wide splash attack range with her scythe, just like Dark Storm.
Tactical Solutions:
Killing the Storm sisters is not so difficult now with their lowered HP cap and is easier to do by whittling their HP down together. The only issue is killing them both or within an approximate 10-15 second buffer, should they be defeated separately (Usually not a problem for a smart player or coordinated team). Having them both in your sights is actually better so you can see what they are doing next.
Boss:
 | |
| Rukkha |
Rukkha's attack methods have largely been revised and extremely powerful than before. Most noticeably, it is the range of his attacks being reduced in trade for power. Rukkha itself attacks at an increased speed.
- The earth spike is now telegraphed at its appearing location, it will not occur if your feet are off the ground at the time of tracking.
- The healing fields will recover some of Rukkha's health but will fully heal yours should you need to do so.
- The branches no longer extend their heads out but have a large bite area when they are attacking.
- Rukkha's attack speed with his roars have increased and so has it's power. But the range is reduced slightly.
Tactical Solutions:
You can go straight for all 4 heads without trouble now, since the acid rain threat is no longer existent. Care should be taken to avoid his clearly telegraphed attacks as they are very heavy on the player.
==============================================================================================================
 | ||
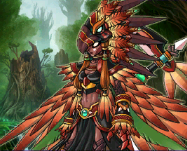
| Sataniel's Warrior |
The power of their attacks still remain but longer telegraphy makes it easier to see his attacks coming. They will still occasionally block attacks as well if you attempt to knock them down.
- These minotaurs no longer use the sudden spin attack which usually dealt a lot of surprise and lethal damage. Taking away much of their threat.
 | |
| Gargoyle |
The Gargoyle is less of a surprise threat with its swift attack thanks to longer telegraphy. It's general offensive strength has dropped as well, making them left out as an annoyance to be chased down instead.
- Gargoyles break away from their statue forms much faster now.
- Only Hellspears can pierce through their defense while in statue form.
 | |
| Dark Hierophant |
The Hierophant is less dangerous now that its damage and side effects have been reduced a lot. They still remain as an annoying enemy to hunt, and no longer teleport rampantly like they used to.
- It no longer uses the HP/MP drain attack, so it puts a lot of relief when required to attack with melee.
- The red orb that chases you now only drains 1 bar of MP instead of the entire gauge. It's meteor storm is also less deadly.
 | |
| Hera |
Heras have been much reduced to weakness. Their previously lethal magic-based attacks don't do as much now but is still dangerous when the damage accumulates. Avoid their screams and you will be fine.
- Her magic attacks are better telegraphed now. Especially the two-way beam attack which comes from off-screen.
- Hera no longer uses the evil mist attack.
Mini-Boss:
 | |
| Iblis |
Iblis remains as deadly as before but without that defense glitch occurring as often (Yes she still uses it to some tolerable degree)
- Her Guardian retains all it's attacks and they hit quite hard now, all of it too. They're better telegraphed but it doesn't change her threat status.
- If you remain too far from them, her Guardian may sometimes enter a beam-firing rampage against you (the bolt from its head), if that happens, quickly close the distance lest it kills you.
Tactical Solutions:
With the Dodge ability it should be easier to take Iblis head on. Her Guardian remains a viable threat and due care should be taken to also not prematurely exhaust your Dodge meter, as you will need to use it quite a bit. If you need MP, attacking the Guardian will also provide you with some, though no damage is dealt to Iblis.
Boss:
 | |
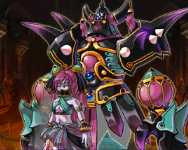
| Thanatos (3rd Form) |
Thanatos has 3 forms (sorry, the cards don't show the other two) and they've all been reduced to much easiness to kill. Let's start with the 1st form.
1st Form: (Threat Level: ↓) (Offensive Power: ↑↑)
He doesn't move physically so he's just a sitting target for you. He doesn't play around with surprise attacks anymore since they are now well telegraphed if he tries to do anything.
- Kill his two Hierophants first to relieve the combat pressure on you.
2nd Form: (Threat Level: •) (Offensive Power: ↑)
Previously the bane of fighting him, he doesn't ridiculously disappear into the sky now but will occasionally and will deliberately stay on higher ground than you. He also stops more often thus making it easier to attack him.
- His attacks deal damage in parts so it's possible to always cut yourself off from continuous injury. No luck about that skull-head cloud of doom, you just have to outrun it.
3rd Form: (Threat Level: ↑) (Offensive Power: ↑↑)
Although he's no longer as deadly as before, he still makes a threatening force to reckon with if you play carelessly with him. Some attacks are slower, some attacks are faster but all should be handled with great caution.
- For one, Gargoyles no longer come to his aid. Instead two Heras on both sides appear when his HP is down to near 1x... Kind of pointless considering he is too near to death to ask for help.
- Unlike the Hierophants, his black tornado attack will still drain your entire MP gauge if you are hit by it.
- He lets off attacks really quickly without delay, so keep a sharp eye on especially his hand movements.
Tactical Solutions:
Thanatos in all 3 forms is no longer that difficult to kill because of his heavily reduced HP cap. Whatever you do, try to avoid luring him to the left where the Hellfire (Starkiln's) rune is, as it is detrimental to you more than it is to Thanatos and his lackeys; it also makes attacking him a tedious chore if he goes to the sides anyway.
==============================================================================================================
No comments:
Post a Comment